Developing on Windows#
Every chapter builds and uploads on Windows with the same commands used on
Linux and macOS. What differs is the port name (COM3 rather than
/dev/ttyACM0) and how the tools are installed.
A handful of errors, however, only appear on Windows, and they are hard to read if you have not seen them before. This page shows each one as it actually prints. It also covers talking to the board from Python, which the book does not describe anywhere.
Note
Every output on this page was captured from a real Arduino UNO R4 WiFi attached to Windows 11, driven from PowerShell 7. The Windows error messages are localized by the OS, so on an English install the wording differs while the error class and numeric code stay the same.
1. Set up the environment#
Open PowerShell#
The quickest way is right-click the Start button → “Terminal” (Win + X
opens the same menu). Typing PowerShell into the Start menu works as well.
No administrator rights are needed.
Windows 11 ships with Windows PowerShell 5.1, and every command on this page runs there as written. To see which one you opened:
$PSVersionTable.PSVersion
The newer PowerShell 7
(invoked as pwsh, not powershell) is fine too — the outputs on this page
were captured with PowerShell 7.6.2.
Command Prompt (cmd.exe) can build and upload as well, but the examples here
follow PowerShell syntax.
Install uv#
uv manages the Python environment and its packages in one tool; it is all the sample code needs.
Open PowerShell and run:
powershell -ExecutionPolicy ByPass -c "irm https://astral.sh/uv/install.ps1 | iex"
winget install --id=astral-sh.uv -e works too. Other options are in
uv’s installation guide.
The installer drops uv in %USERPROFILE%\.local\bin and adds that to PATH
(the list of folders the OS searches so that you can run a command by its name
alone), so
uv is not found until you reopen PowerShell. Reopen it, then check:
uv --version
uv 0.9.26
Get the sample code#
Windows does not come with git, so install it first and reopen PowerShell (Git for Windows).
winget install --id Git.Git -e --source winget
git clone https://github.com/iory/learning-os-from-arduino.git
cd learning-os-from-arduino\docs\os-on-arduino\code
uv sync
uv sync installs PlatformIO and
pyserial. Every command below is run through
uv run.
2. Find the board#
Plug the board in over USB, then:
uv run pio device list
COM3
----
Hardware ID: USB VID:PID=2341:1002 SER=B43A45B9F1CC LOCATION=-4:x.1
Description: USB シリアル デバイス (COM3)
The number varies per machine (COM4, COM5, …). The same entry appears in
Device Manager under Ports (COM & LPT).
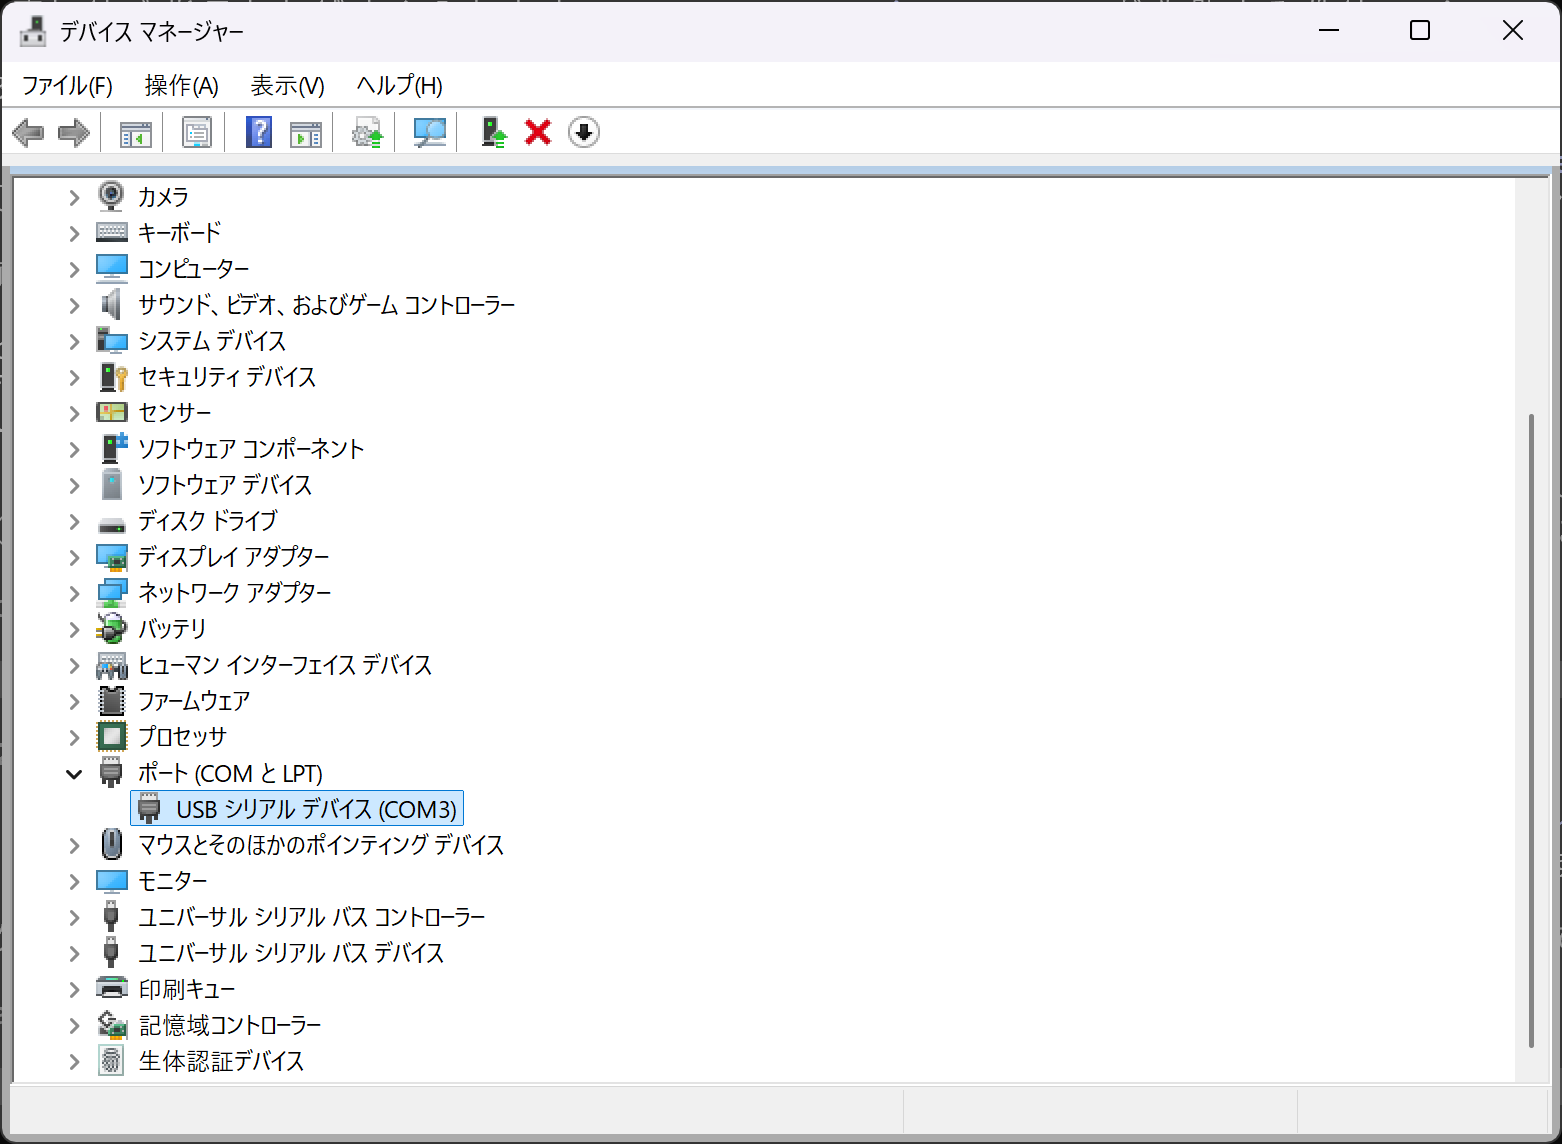
How the board appears in Device Manager (Japanese Windows shown; an English install reads “USB Serial Device (COM3)”)#
The name is the confusing part: it is not shown as Arduino UNO R4 WiFi.
The board runs on the stock Windows USB CDC driver, so it appears as
“USB Serial Device (COMn)”. Installing the Arduino IDE does not change this.
What identifies it is VID:PID=2341:1002 in the Hardware ID. 2341 is
Arduino’s vendor ID; use it to tell the board apart from other USB serial
devices (section 6 does exactly that).
3. Build and upload#
Pass the chapter directory to -d:
uv run pio run -d 05_shell -t upload
Configuring upload protocol...
AVAILABLE: cmsis-dap, jlink, sam-ba
CURRENT: upload_protocol = sam-ba
Looking for upload port...
Auto-detected: COM3
Forcing reset using 1200bps open/close on port COM3
Uploading .pio\build\uno_r4_wifi\firmware.bin
Erase flash

Done in 0.000 seconds
Write 41200 bytes to flash (11 pages)

[==============================] 100% (11/11 pages)
Done in 2.803 seconds
========================= [SUCCESS] Took 7.23 seconds =========================
As Auto-detected: COM3 shows, the port is normally found for you. Add
--upload-port COM3 only when another USB serial device is picked instead.
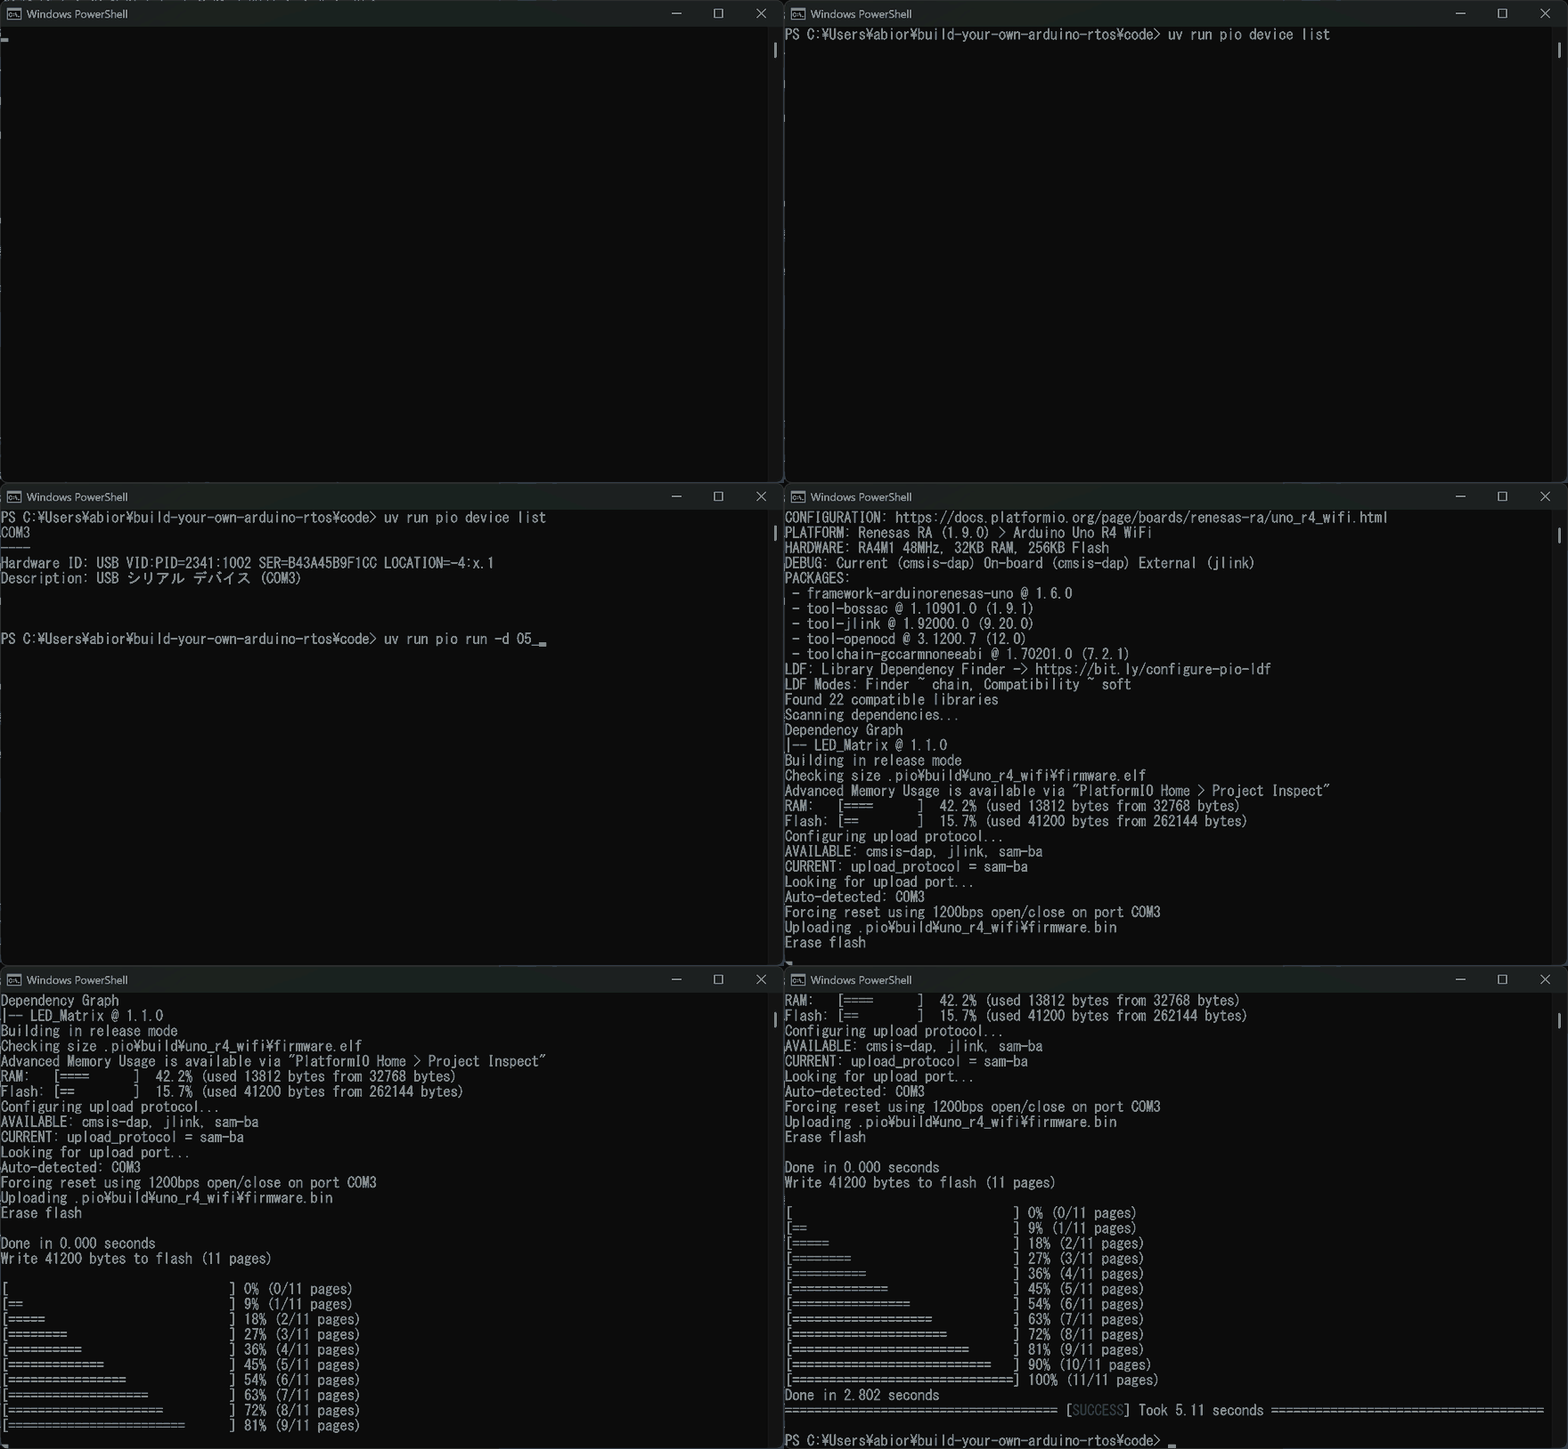
Checking the port and uploading, recorded from a real PowerShell session#
4. Watch the serial output#
uv run pio device monitor -b 115200
--- Terminal on COM3 | 115200 8-N-1
--- Available filters and text transformations: debug, default, direct, hexlify, log2file, nocontrol, printable, send_on_enter, time
--- More details at https://bit.ly/pio-monitor-filters
--- Quit: Ctrl+C | Menu: Ctrl+T | Help: Ctrl+T followed by Ctrl+H
Ctrl-C leaves the monitor.
Important
Nothing after those four lines is normal, not a fault.
Opening the serial port does not reset the UNO R4 WiFi. USB serial is handled by the on-board ESP32-S3, which runs independently of the RA4M1 your program is on. Unlike most Arduino-compatible boards, the sketch does not restart the moment a monitor attaches.
So for chapters that only print inside setup(), the startup banner has
already gone by the time the monitor opens. To see it, open the monitor right
after uploading, or press RESET once. In the Chapter 5 shell, typing reboot
does the same thing.
Why chapter 1 waits for an S
Chapter 1’s sketch prints nothing until you send a single S from the
monitor. Type S once the monitor is open.
The board starts running the instant it is powered, while you need a few
seconds to open the monitor after flashing. In a chapter that prints once from
setup() and stops, written naively it would finish printing before your
monitor is even open, and you would see nothing.
The S is how the PC says “I am ready”:
while (Serial.read() != 'S') { delay(1); }
01_boot, 01_boot_vector_dump, adv3_heap and adv4_fs work this way.
Chapters that keep printing (chapter 2, for example) do not need it.
5. Where Windows trips you up#
You cannot upload while the monitor is open#
On Windows one process holds a serial port exclusively. Uploading with the monitor still open gives:
Looking for upload port...
Auto-detected: COM3
*** [upload] could not open port 'COM3': PermissionError(13, 'アクセスが拒否されました。', None, 5)
========================== [FAILED] Took 0.94 seconds ==========================
The trailing 5 is the Windows error code ERROR_ACCESS_DENIED (“Access is
denied.”); the message text follows the OS language. It is the equivalent of
Device or resource busy on Linux. Close the monitor with Ctrl-C and upload
again.
The same happens when the Arduino IDE’s serial monitor, or a Python script of your own, holds the port. Only one program at a time may open a COM port.
Wrong COM number#
Pointing at a port that does not exist gives a different error:
Looking for upload port...
Using manually specified: COM9
*** [upload] could not open port 'COM9': FileNotFoundError(2, '指定されたファイルが見つかりません。', None, 2)
========================== [FAILED] Took 0.94 seconds ==========================
FileNotFoundError means the port number is wrong; PermissionError means it
is in use. Knowing which is which makes this a five-second diagnosis. Run
uv run pio device list to confirm the number.
The number is not fixed. Unplug and replug the board, or attach another USB
serial device first, and the same board can move from COM3 to COM5. If
FileNotFoundError appears out of nowhere, check this first — Device Manager’s
“Ports (COM & LPT)” shows it too.
The same happens on Linux (/dev/ttyACM0 becomes /dev/ttyACM1). Section 6
shows how to write code that does not depend on the number.
It stops with No device found on COMn#
The board is not in bootloader mode (the bootloader is a small program that stays on the microcontroller to accept new firmware). Press RESET twice quickly to drop into the bootloader — the L LED fading slowly in and out means it worked — then upload again.
This is also what you see right after halting the CPU with a debugger (CMSIS-DAP, or VS Code debugging): the 1200 bps reset the uploader relies on no longer takes effect.
Other things#
Plug into the PC directly rather than through a USB hub; uploads through hubs sometimes fail
Check the cable carries data — a charge-only cable produces no port at all
6. Talking to the board from Python#
Driving the board from Python instead of a serial monitor lets you save the output, or read a reply and decide what to send next. The Chapter 13 quadruped is brought up exactly this way.
The library is pyserial, already
installed by uv sync.
The smallest example#
Run this with Chapter 5 (05_shell) on the board:
import sys
import time

import serial

ser = serial.Serial("COM3", 115200, timeout=0.2)
time.sleep(1.0)
ser.reset_input_buffer()

for cmd in (b"help\n", b"info\n"):
    ser.write(cmd)
    time.sleep(0.6)
    text = ser.read(8192).decode("utf-8", "replace")
    sys.stdout.write(text.replace("\r\n", "\n"))

ser.close()
First save the code above as hello_serial.py in the docs\os-on-arduino\code
folder, then run it:
uv run python hello_serial.py
help
Available commands:
  ps      - List all tasks
  kill N  - Suspend task N
  exec N  - Resume task N
  info    - System information
  reboot  - Reboot system
  help    - Show this help
> info

=== System Information ===
System Ticks:  67770
Uptime:        67 s
Task Count:    5
Time Slice:    10 ms

>
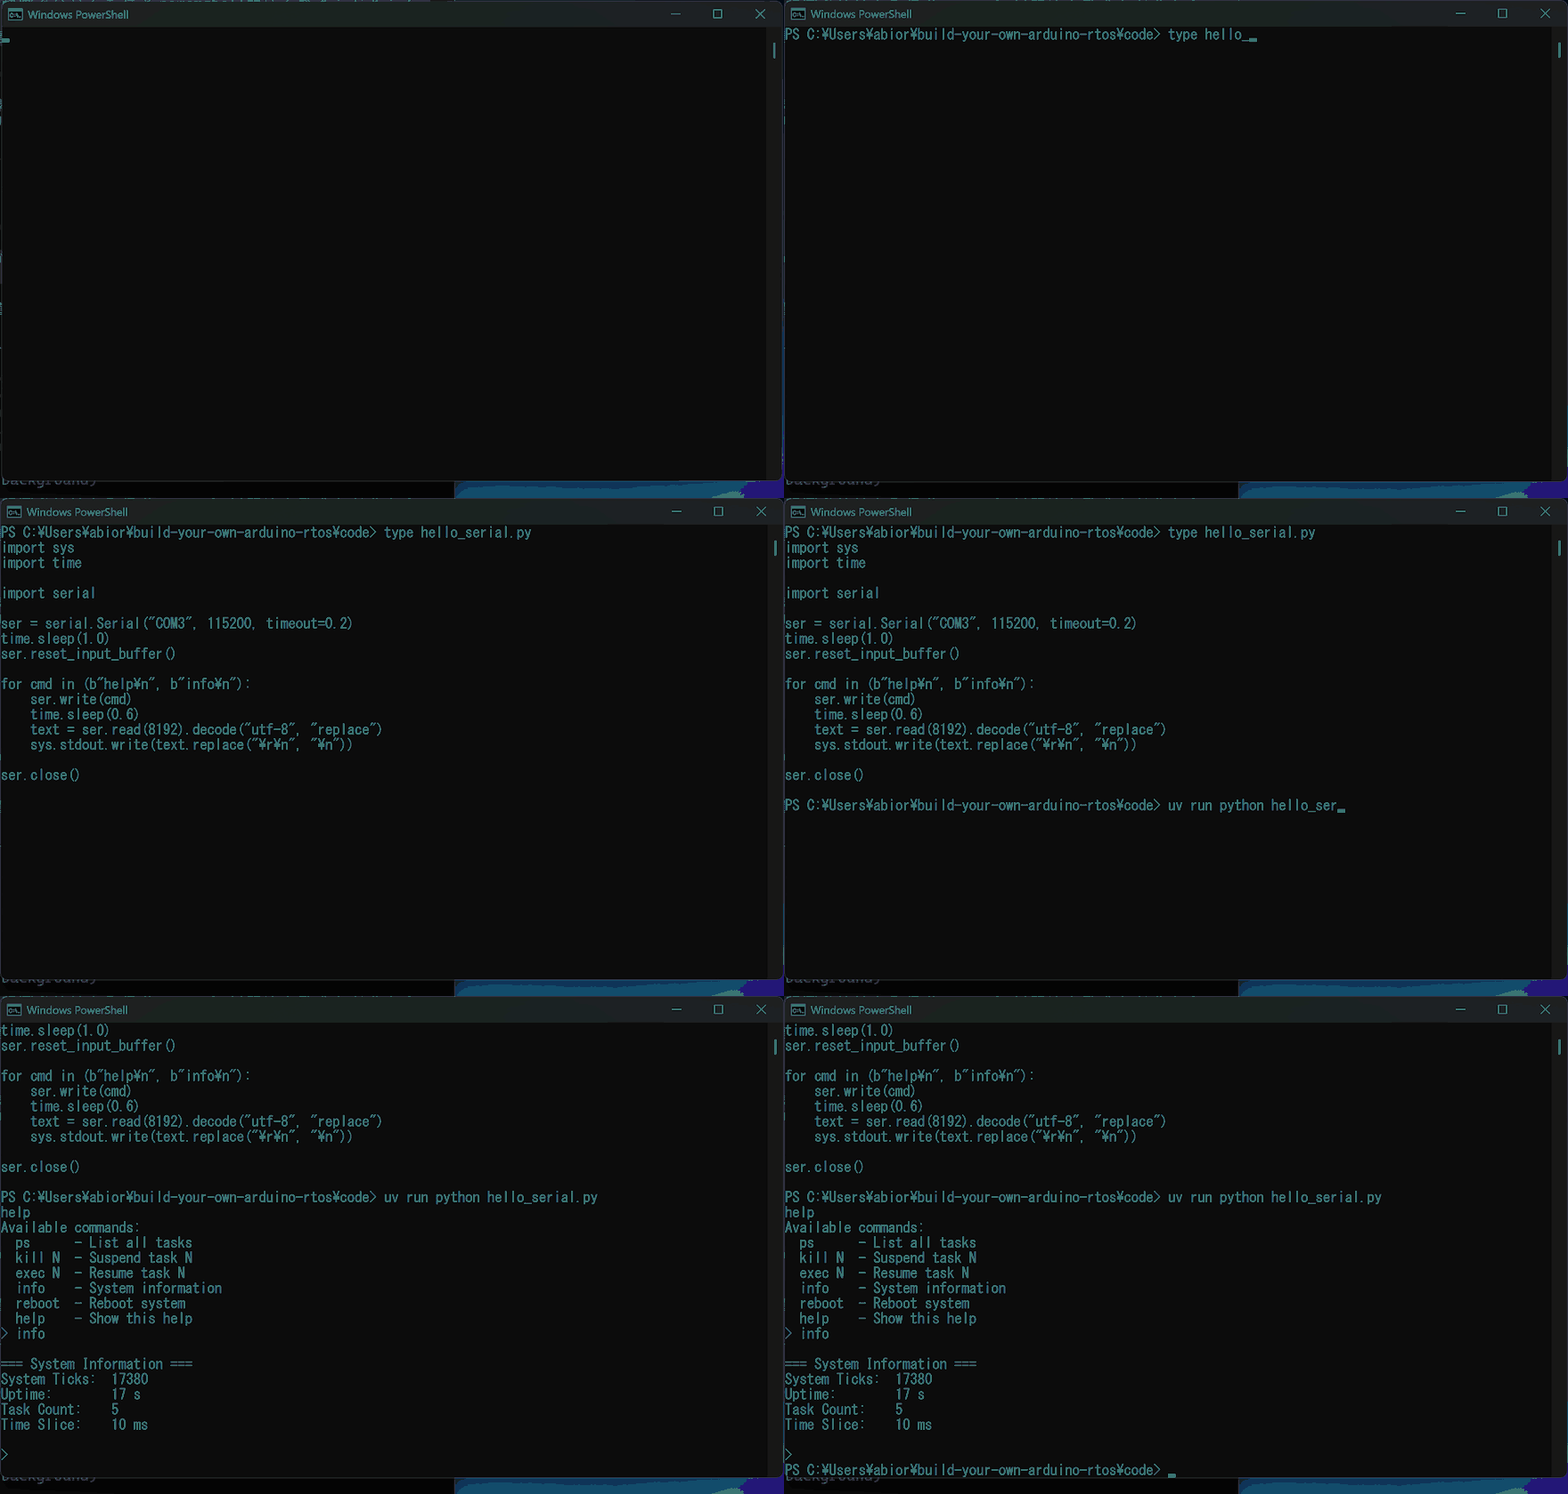
Running hello_serial.py and getting the board’s shell to answer#
Send ps and the task table comes back the same way:
ID  NAME           STATE      CPU%
--  ----           -----      ----
0   idle           READY     100%
1   LED1           BLOCKED   0%
2   LED2           BLOCKED   0%
3   Heartbeat      BLOCKED   0%
4   Shell          RUNNING   0%
Stop hard-coding the port number#
COM3 breaks as soon as you move to another machine or the port shifts.
Searching by Arduino’s vendor ID (0x2341) makes one piece of code work on
Windows, Linux and macOS alike.
import serial.tools.list_ports

ARDUINO_VID = 0x2341


def find_board():
    """Return the board's port: COM3 on Windows, /dev/ttyACM0 on Linux."""
    for port in serial.tools.list_ports.comports():
        if port.vid == ARDUINO_VID:
            return port.device
    raise RuntimeError("board not found")


print(find_board())
COM3
comports() reads the registry on Windows and /sys on Linux. Only the
returned name differs; the call is identical.
Three things worth knowing up front#
Line breaks come out doubled. The board terminates lines with CRLF.
Printing that straight back doubles the spacing on Windows, because Python
translates the \n into another \r\n. Pass it through
text.replace("\r\n", "\n") as above.
Only one program can hold the port. The serial monitor, the Arduino IDE
and your own script are mutually exclusive. If your script raises
PermissionError, close the monitor first.
Opening the port does not restart the board. As in section 4. Waiting for
setup() output right after Serial() waits forever. To catch the startup
output, open the port immediately after uploading — the COM port does not
disappear across an upload on the UNO R4 WiFi, so opening it straight away
catches the boot messages:
=== Interactive Shell Demo ===

Tasks created. Starting OS...


Mini OS Shell
Type 'help' for commands.
>
7. Driving the quadruped from the PC#
You can skip this until Chapter 13.
The fastest way to bring the Chapter 13 quadruped up is to drive the servos
from the PC before flashing anything. Those tools live in
docs/os-on-arduino/code/13_quadruped/host/
and run on Windows as they are.
cd 13_quadruped\host                   # from docs\os-on-arduino\code
uv run python quad_host.py --port COM3 scan        # how many servos answer
uv run python quad_host.py --port COM3 calibrate   # measure sign and zero -> calib.json
uv run python quad_host.py --port COM3 stand       # hold the home stance
uv run python quad_host.py --port COM3 teleop      # walk it with w/s/a/d
--port takes the COM number of the servo bus USB adapter. With the
Arduino used as a bridge (--bus bridge) it is the Arduino’s COM number.
Omit it and the tool uses the port recorded in calib.json, falling back to
probing the attached USB serial devices.
teleop reads single keypresses, so run it directly in a PowerShell
window. Ctrl-C releases servo torque.
Warning
Power the eight servos from the 12 V AC adapter or a battery. Never from the PC’s USB (2.7 A stall current each). Assembly and safety notes are on the Japanese site.
8. Verify every chapter at once#
A bundled script builds, uploads and checks the serial output of every chapter in one run.
# run in docs\os-on-arduino\code (after step 7, go back with cd ..\..)
uv run python scripts\verify_chapters.py --port COM3
OS: Windows 11  Python: 3.12.12
ボード: COM3

=== 01_boot =====================================================
  -> PASS  (15.5s)
     OK  === Boot Sequence Check ===
     OK  BSS がゼロクリアされている
     OK  DATA が Flash からコピーされている
     OK  ベクタテーブルが RAM 上にある
     OK  If you see this, boot sequence completed!

=== 05_shell ====================================================
  -> PASS  (19.7s)
     OK  Available commands:
     OK  ID\s+NAME\s+STATE\s+CPU%
     OK  idle タスクが ID 0 で並ぶ
     OK  CPU% の合計 = 99%(5 タスク)
--only narrows it to specific chapters (the run above used
--only 01_boot 05_shell), and --build-only checks the builds without a
board attached. The script’s messages are in Japanese.
全章の動作確認 — full options and interactive mode, on the Japanese site ↗